How to customize your event types
You can update your event type settings in Calendly to control how and when people can schedule time with you.
Before you begin
- Using managed event types? These include special settings and limits. Learn how to edit admin-managed event types.
- Want to switch event types? You can’t change one type into another (for example, from a one-on-one to a group event). Instead, create a new event type.
- Using the mobile app? See these mobile-specific instructions for editing your event on a phone or tablet.
Edit your event type
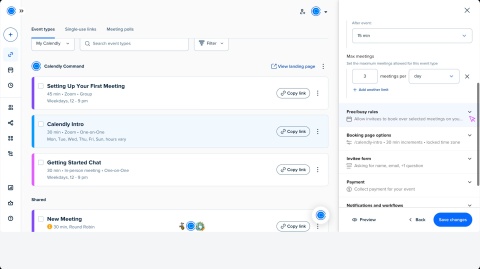
- Go to the Scheduling page.
- (Optional) Open the My Calendly dropdown to switch to another user or team.
- Select the event type you want to edit to open the editor.
Customize your event settings
Each event type includes settings that affect how invitees schedule with you.
Primary settings
Setting | What it controls |
Event name | What invitees see as the title. |
Event color | The color used to identify the event type. |
Duration | How long the meeting lasts. |
Location | Where the meeting takes place (Zoom, phone, in person). Learn more. |
Availability | Set your date range, minimum notice, and available hours. |
Host(s) | Choose who will host the event. |
More options
Select More options to see these additional settings:
Setting | What it controls |
Description | Add details for invitees before the meeting. |
Limits and buffers | |
Free/busy rules | Let invitees book over events on connected calendars. Learn more. |
Booking page options | Customize your event link, start time increments, and time zone display. |
Invitee form | Ask invitees for info before the meeting. Learn more. |
Payment | Collect payments with Stripe or PayPal (Standard plan and above). |
Notifications and workflows | |
Confirmation page | Decide what invitees see after booking. |
Additional settings
- Event language – Pick the language for your event.
- Event permissions – Choose who can view or edit the event.
- Secret events – Hide the event from your main scheduling page.
After making your updates, your event is ready to share.